Howl's Moving Castle Animated Illustration
Overview
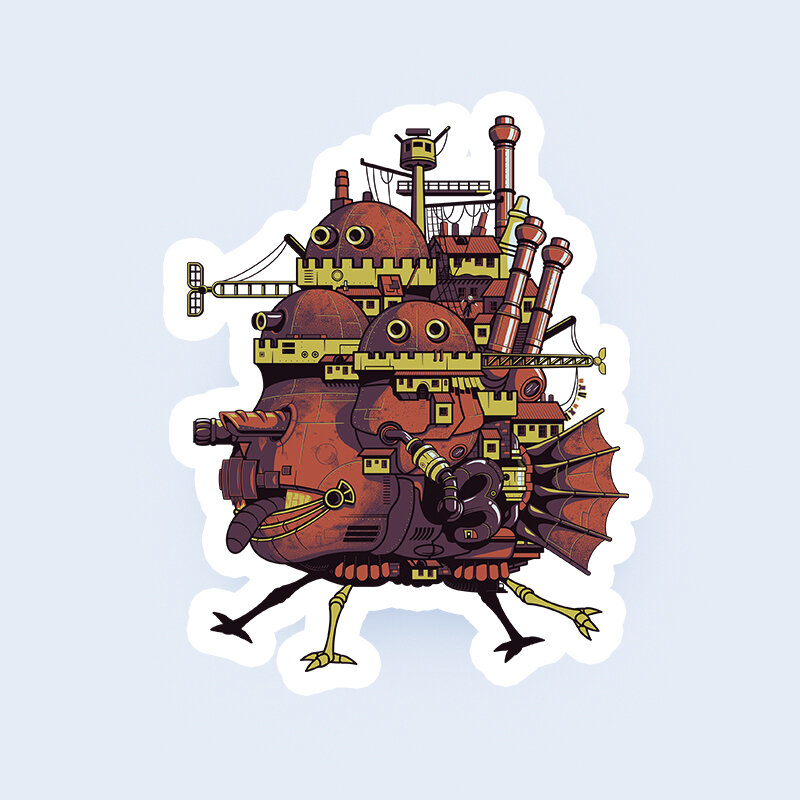
Third up in my series of vectoring Studio Ghibli films, and likely the most complex, is the iconic set piece from Howl’s Moving Castle. This half Illustrator, half After Effects breakdown will cover creating the castle illustration and animating everything into a short and extra bouncy bouncy walk cycle.
Part 1: Illustrator
Reference
For this illustration I leaned heavily on reference images found at Animation Screencaps. The site is a wonderful collection of high res screens, captured every few seconds from hundreds of animated movies.
Like many Miyazaki movies, the details vary from scene to scene, so it’s best to grab a bunch of reference materials and choose the bits that work best.
Palette
This illustration uses a 5-color palette sampled from the screen captures and tweaked for harmony. With limited palette pieces like this, I never use black, but rather opt for a very dark saturated hue – it gives everything a nice richness. Each color is defined as a global to allow quick changes and experimentation at a later time. The whole piece will strictly use these solid colors with no gradients or blending modes.


Using HSB for color modes is by far the easiest to adjust.
One notable color management tip is to work in HSB mode when establishing colors. It’s much easier on the brain to choose the actual color with one slider, and adjust its saturation and brightness with the other two. You can always toggle it back to CMYK or RGB once you find the perfect dark purple or brilliant pink. Compare that to fiddling with CMYK sliders, or trying to divine the proper blend of RGB to easily achieve that same purple or pink – it’s nigh impossible.
Body Construction
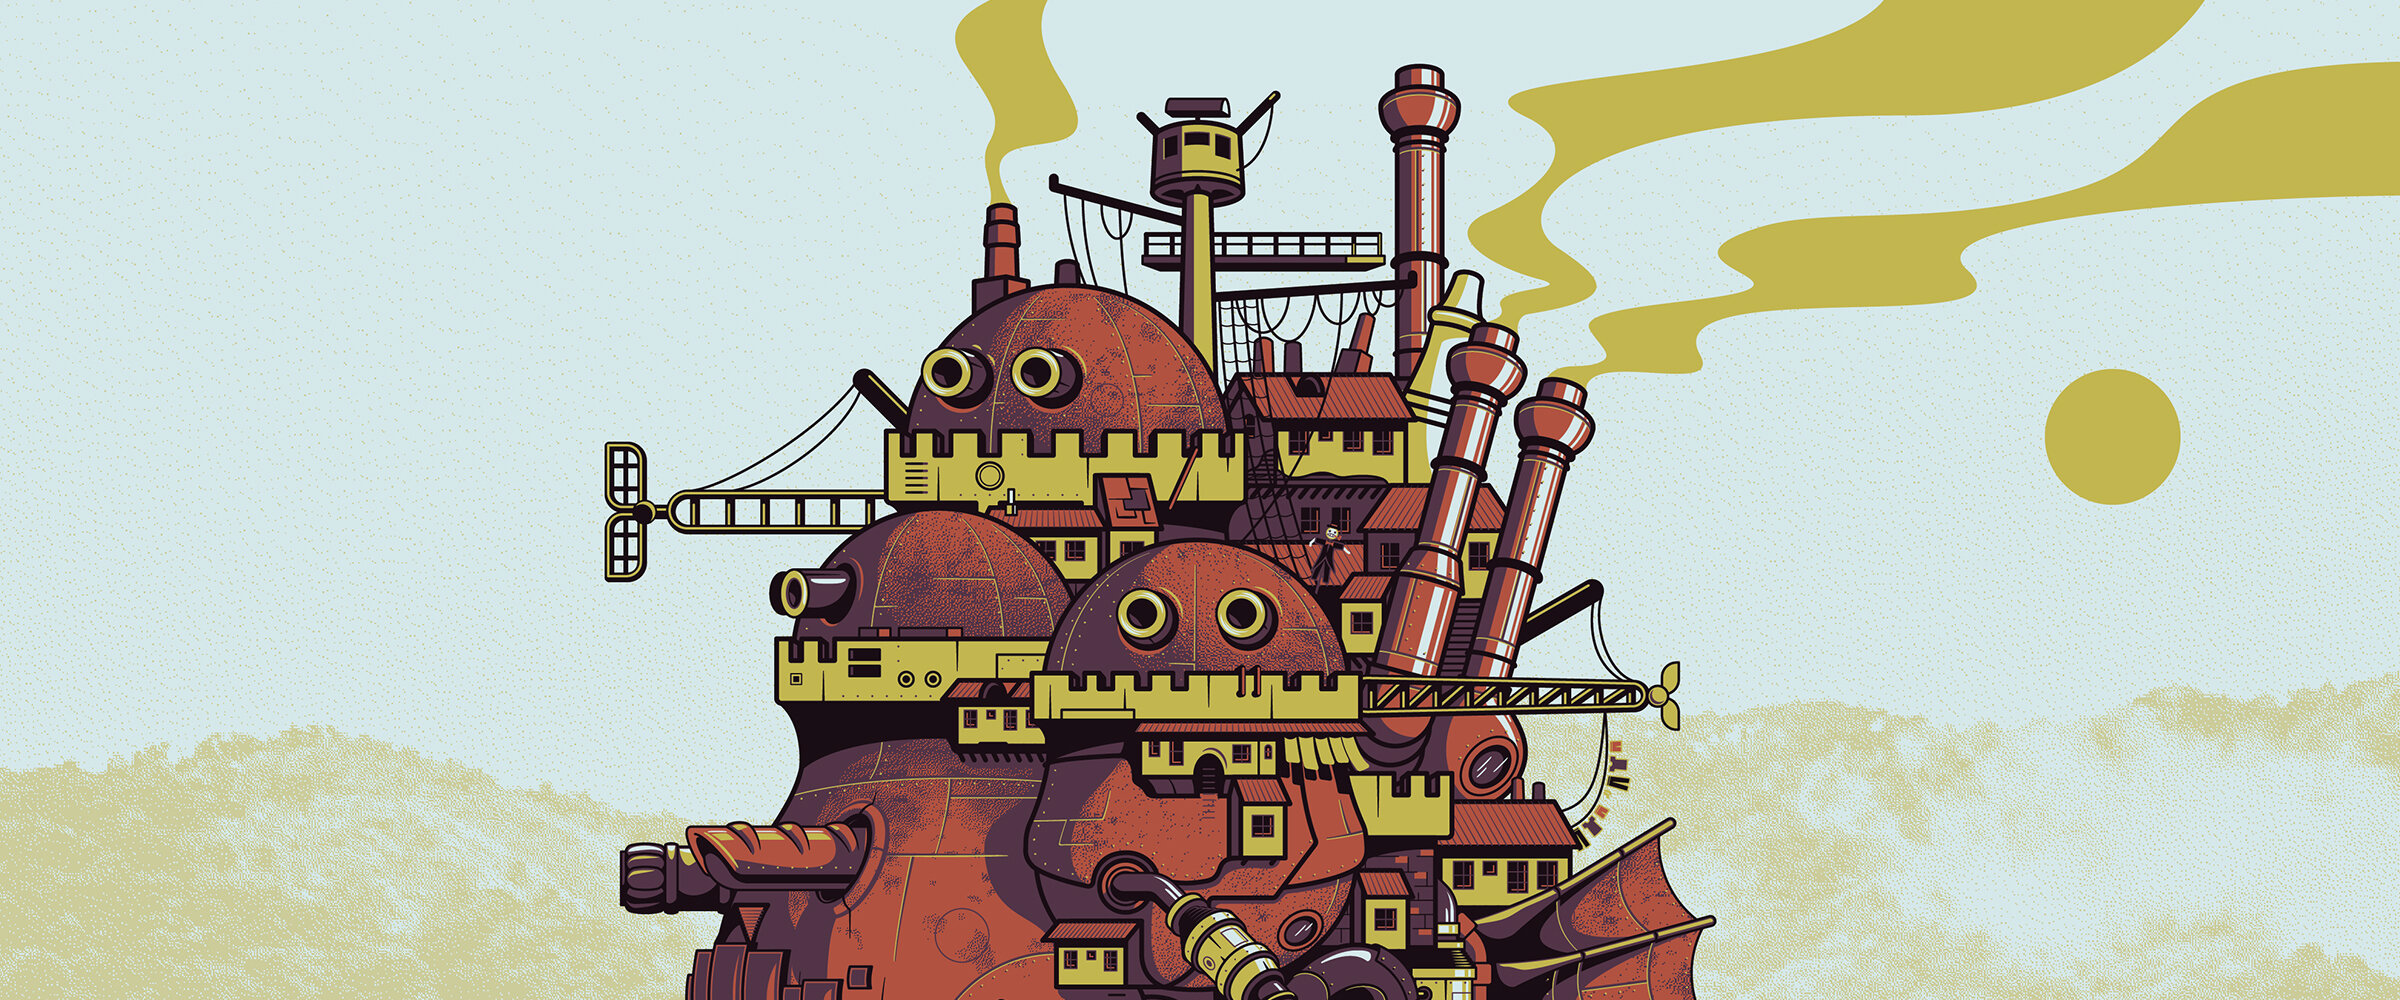
Howl’s Moving Castle is a massive collection of pieces from battleships and assorted boats, held together by magic, traveling across the land on big spindly chicken legs – quite literally the Frankenstein’s monster of castles. Despite the overall complexity, the the best way to eat this elephant is one bite at a time. The legs, face/head, and two connecting turrets were the first pieces to be vectored. Working from front to back, the rest of the castle took shape.
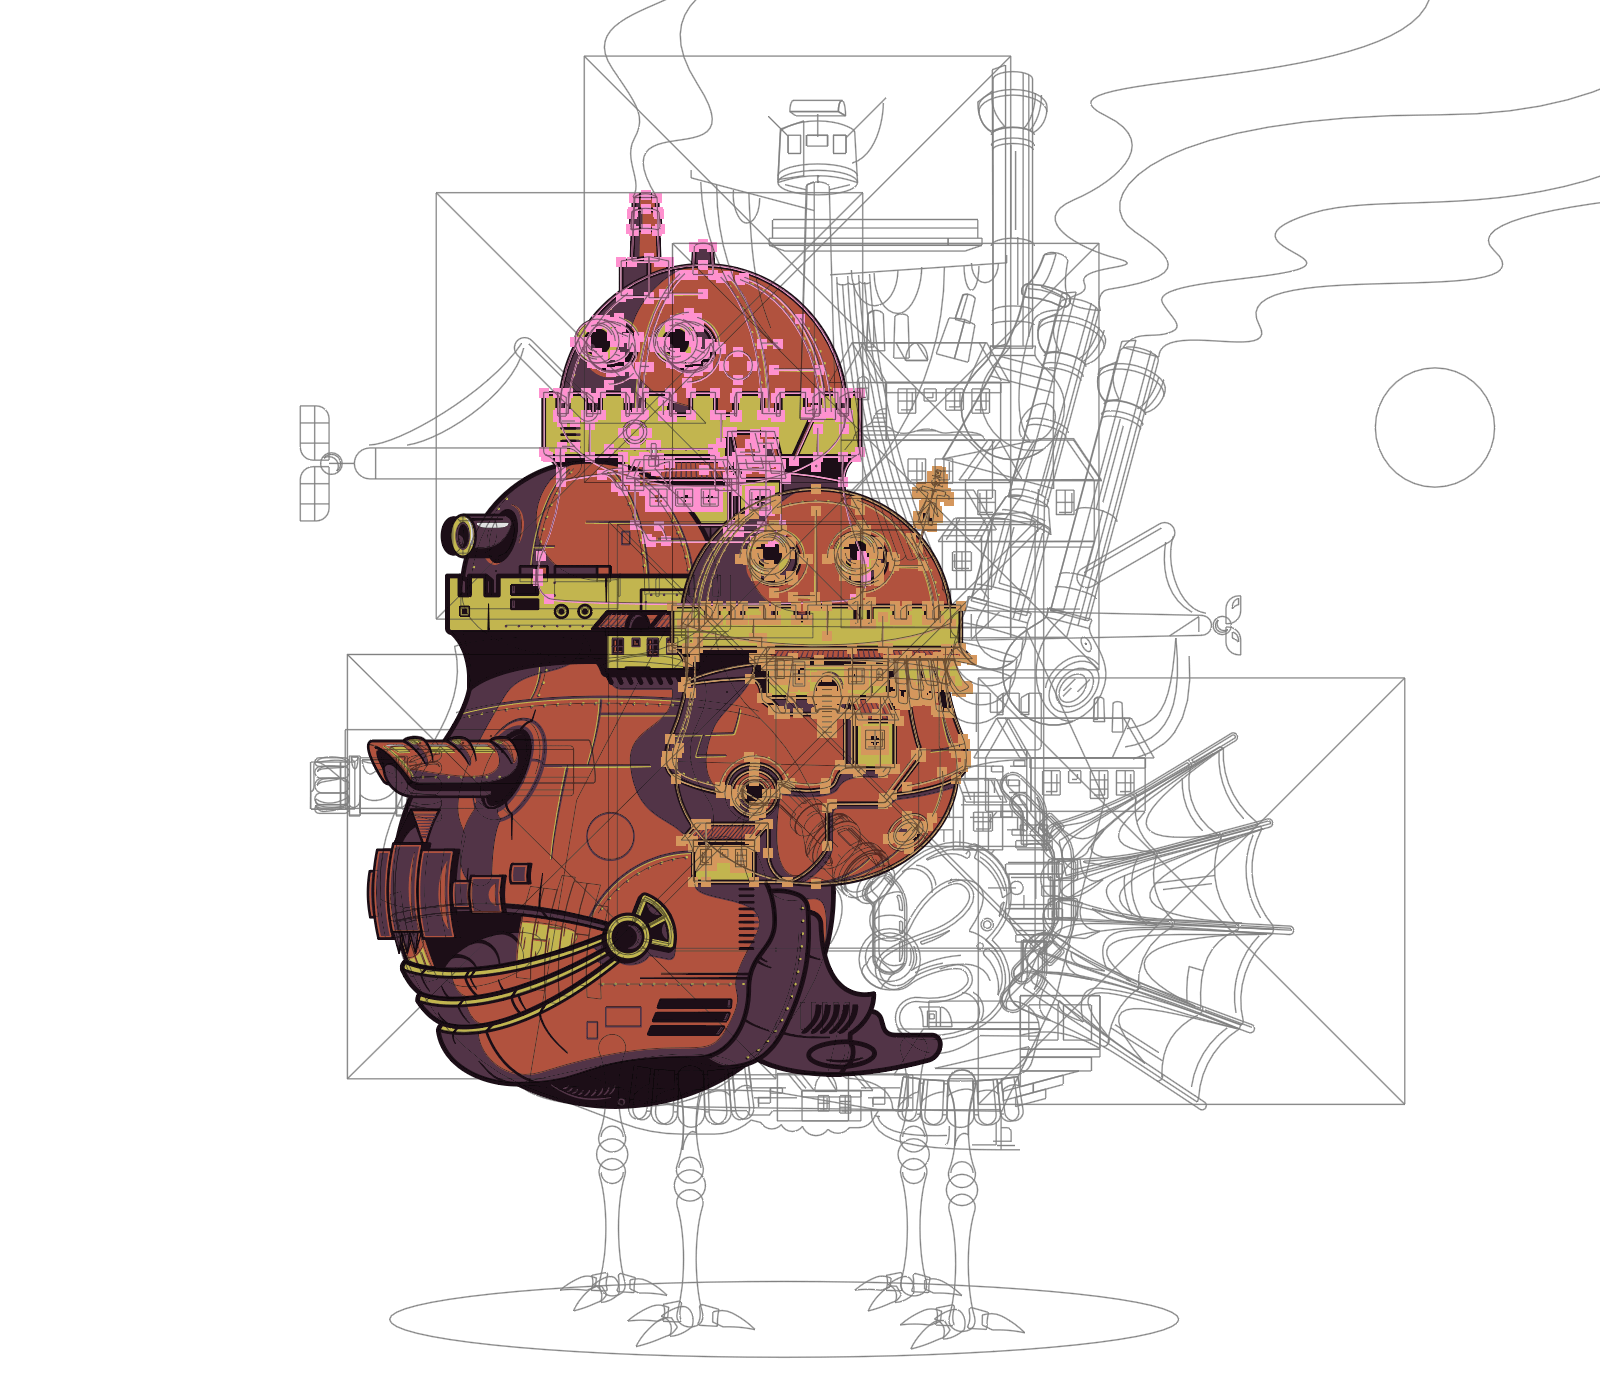
Time was spent filling out details like antennas, ropes, flaps, roof patterns, chimneys, seams, and more. Because the castle has over 50 individual pieces all bouncing around, each element needed to be a complete stand-alone graphic to help with moving overlaps in the animation.

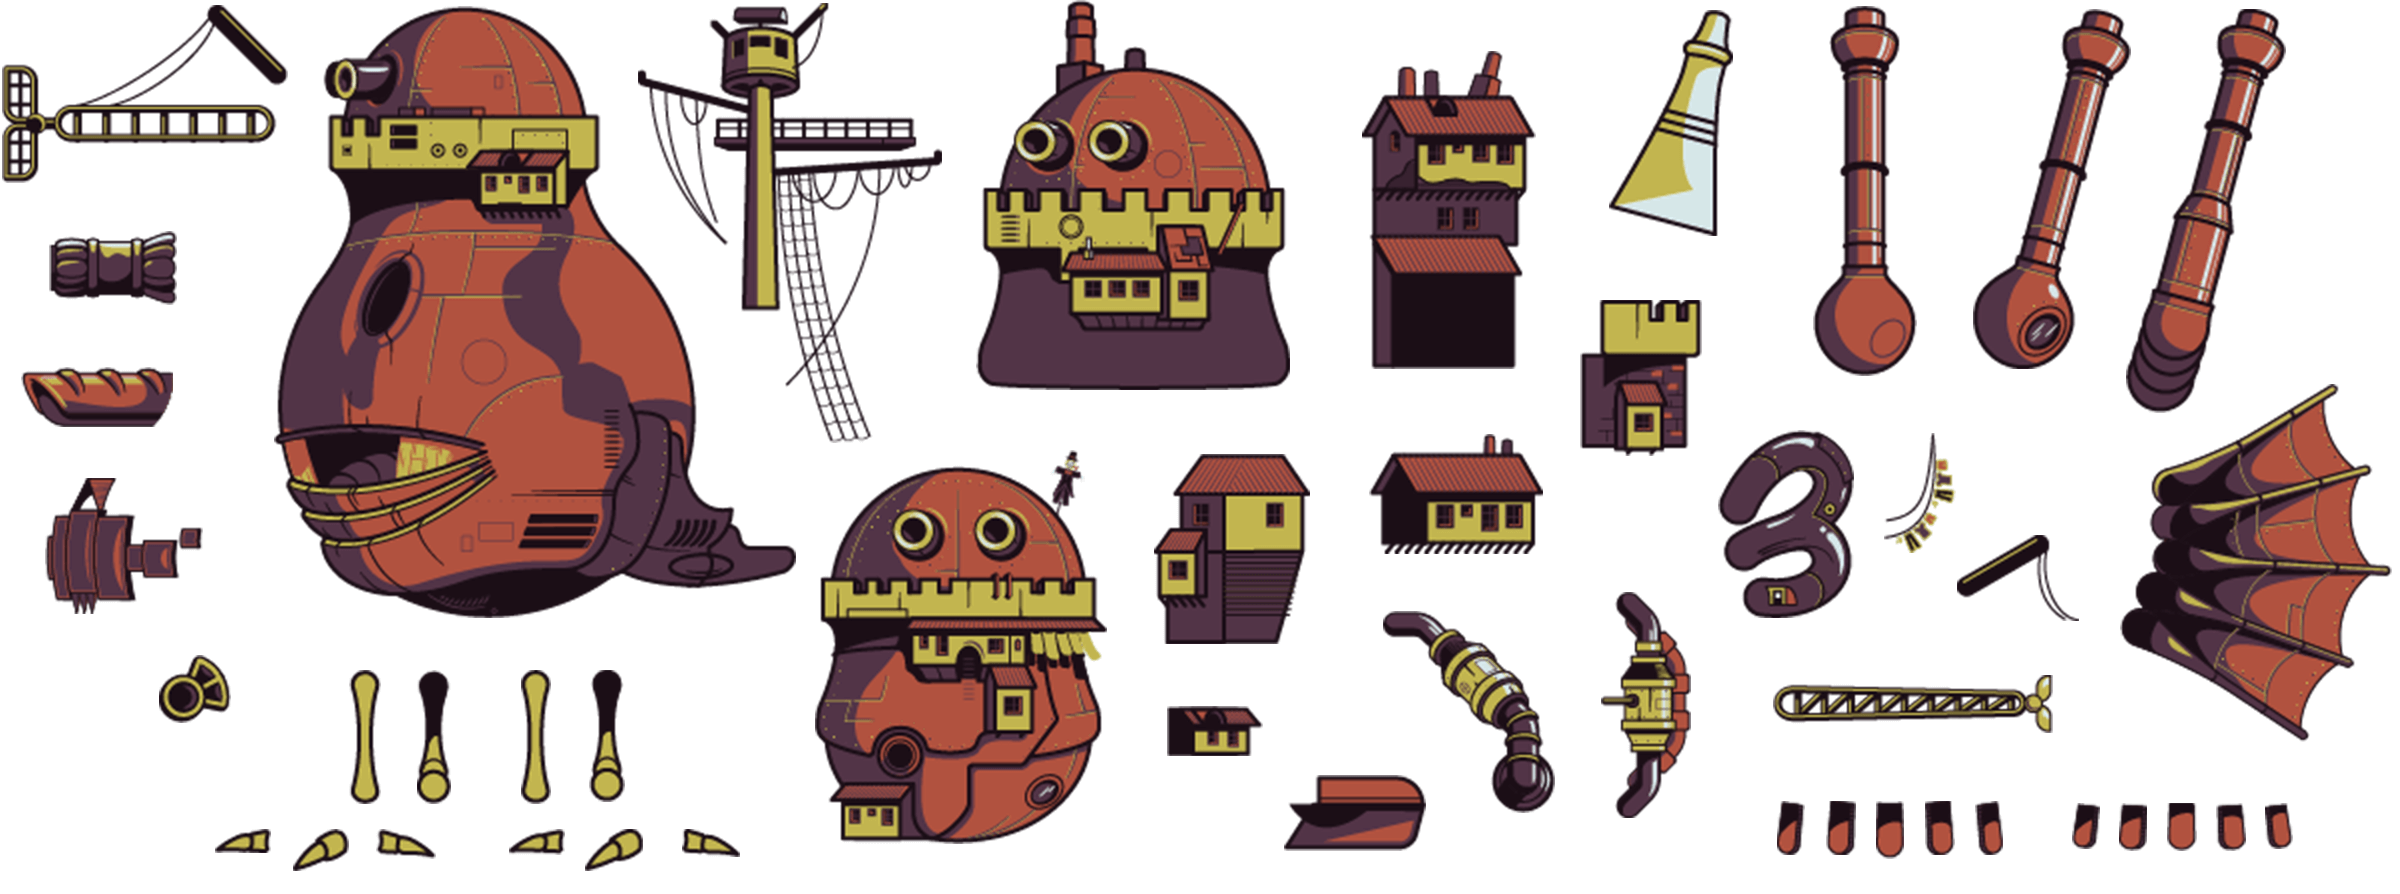
Every articulated piece.
Seams & Rivets
For small accents like seams and rivets, I used the Dashed Line and stroke Profile settings. With a little creativity in the Appearance panel, it’s easy to double each line to create a beveled effect using Distort & Transform > Transform > Move > Horizontal: 1px (or -1px).

Seams are tapered lines with a double stroke, slightly offset, to create a beveled shadow.

Rivets are small dashed strokes with a large gap and capped with a rounded edge.
Using the Appearance panel to build depth and detail (multiple fills and strokes) into a single vector object keeps the overall art tidy and easier to edit, as opposed to multiple objects stacked on top of each other.
Bitmap Textures
Once the castle vectors were complete, a gritty bitmap was added to give everything volume and depth; the castle turrets and background both use single-color bitmaps as textures. The benefit of using bitmaps is their ability to change color simply by selecting a different swatch in Illustrator. This allows for faster experimentation without having to make any color edits in Photoshop.
The particular bitmaps used here are created in Photoshop from a photo by choosing Image > Mode > Bitmap… > Diffusion Dither, and saved as a PSD, then placed into Illustrator. For a more detailed look at creating bitmaps like this, check out my post on making the My Neighbor Totoro house.


Part 2: After Effects
Importing Assets from Illustrator
Howl’s Moving Castle is a giant hulking mass of turrets, smoke stacks, and houses all bouncing along atop tiny chicken legs. In order to animate the pieces in After Effects, each castle section should be properly grouped into its own layer in Illustrator. This will allow AE to import the whole document and maintain the layers as easily articulated sections.

Organize the illustrator file into layers; one layer per castle section to be articulated.
Once the Illustrator doc is ready, head over to After Effects and choose File > Import > File… Select Import As: Composition - Retain Layer Sizes in the drop box. This makes sure each Illustrator layer is only as large as its bounding box, and not the original document. The positive is a tidier document where each piece has a reasonable center point and transform boundaries – the negative is that each castle piece will need to be placed and positioned by hand in the composition.

Choose Retain Layer Sizes.

All the imported layers placed onto the comp, in the correct stacking order, and positioned as they were in the Illustrator file.
It takes a little bit of effort to rebuild and organize the layers back to how they were in the Illustrator file, but once done there are plenty of possibilities for animation.
Walk Cycle Animation
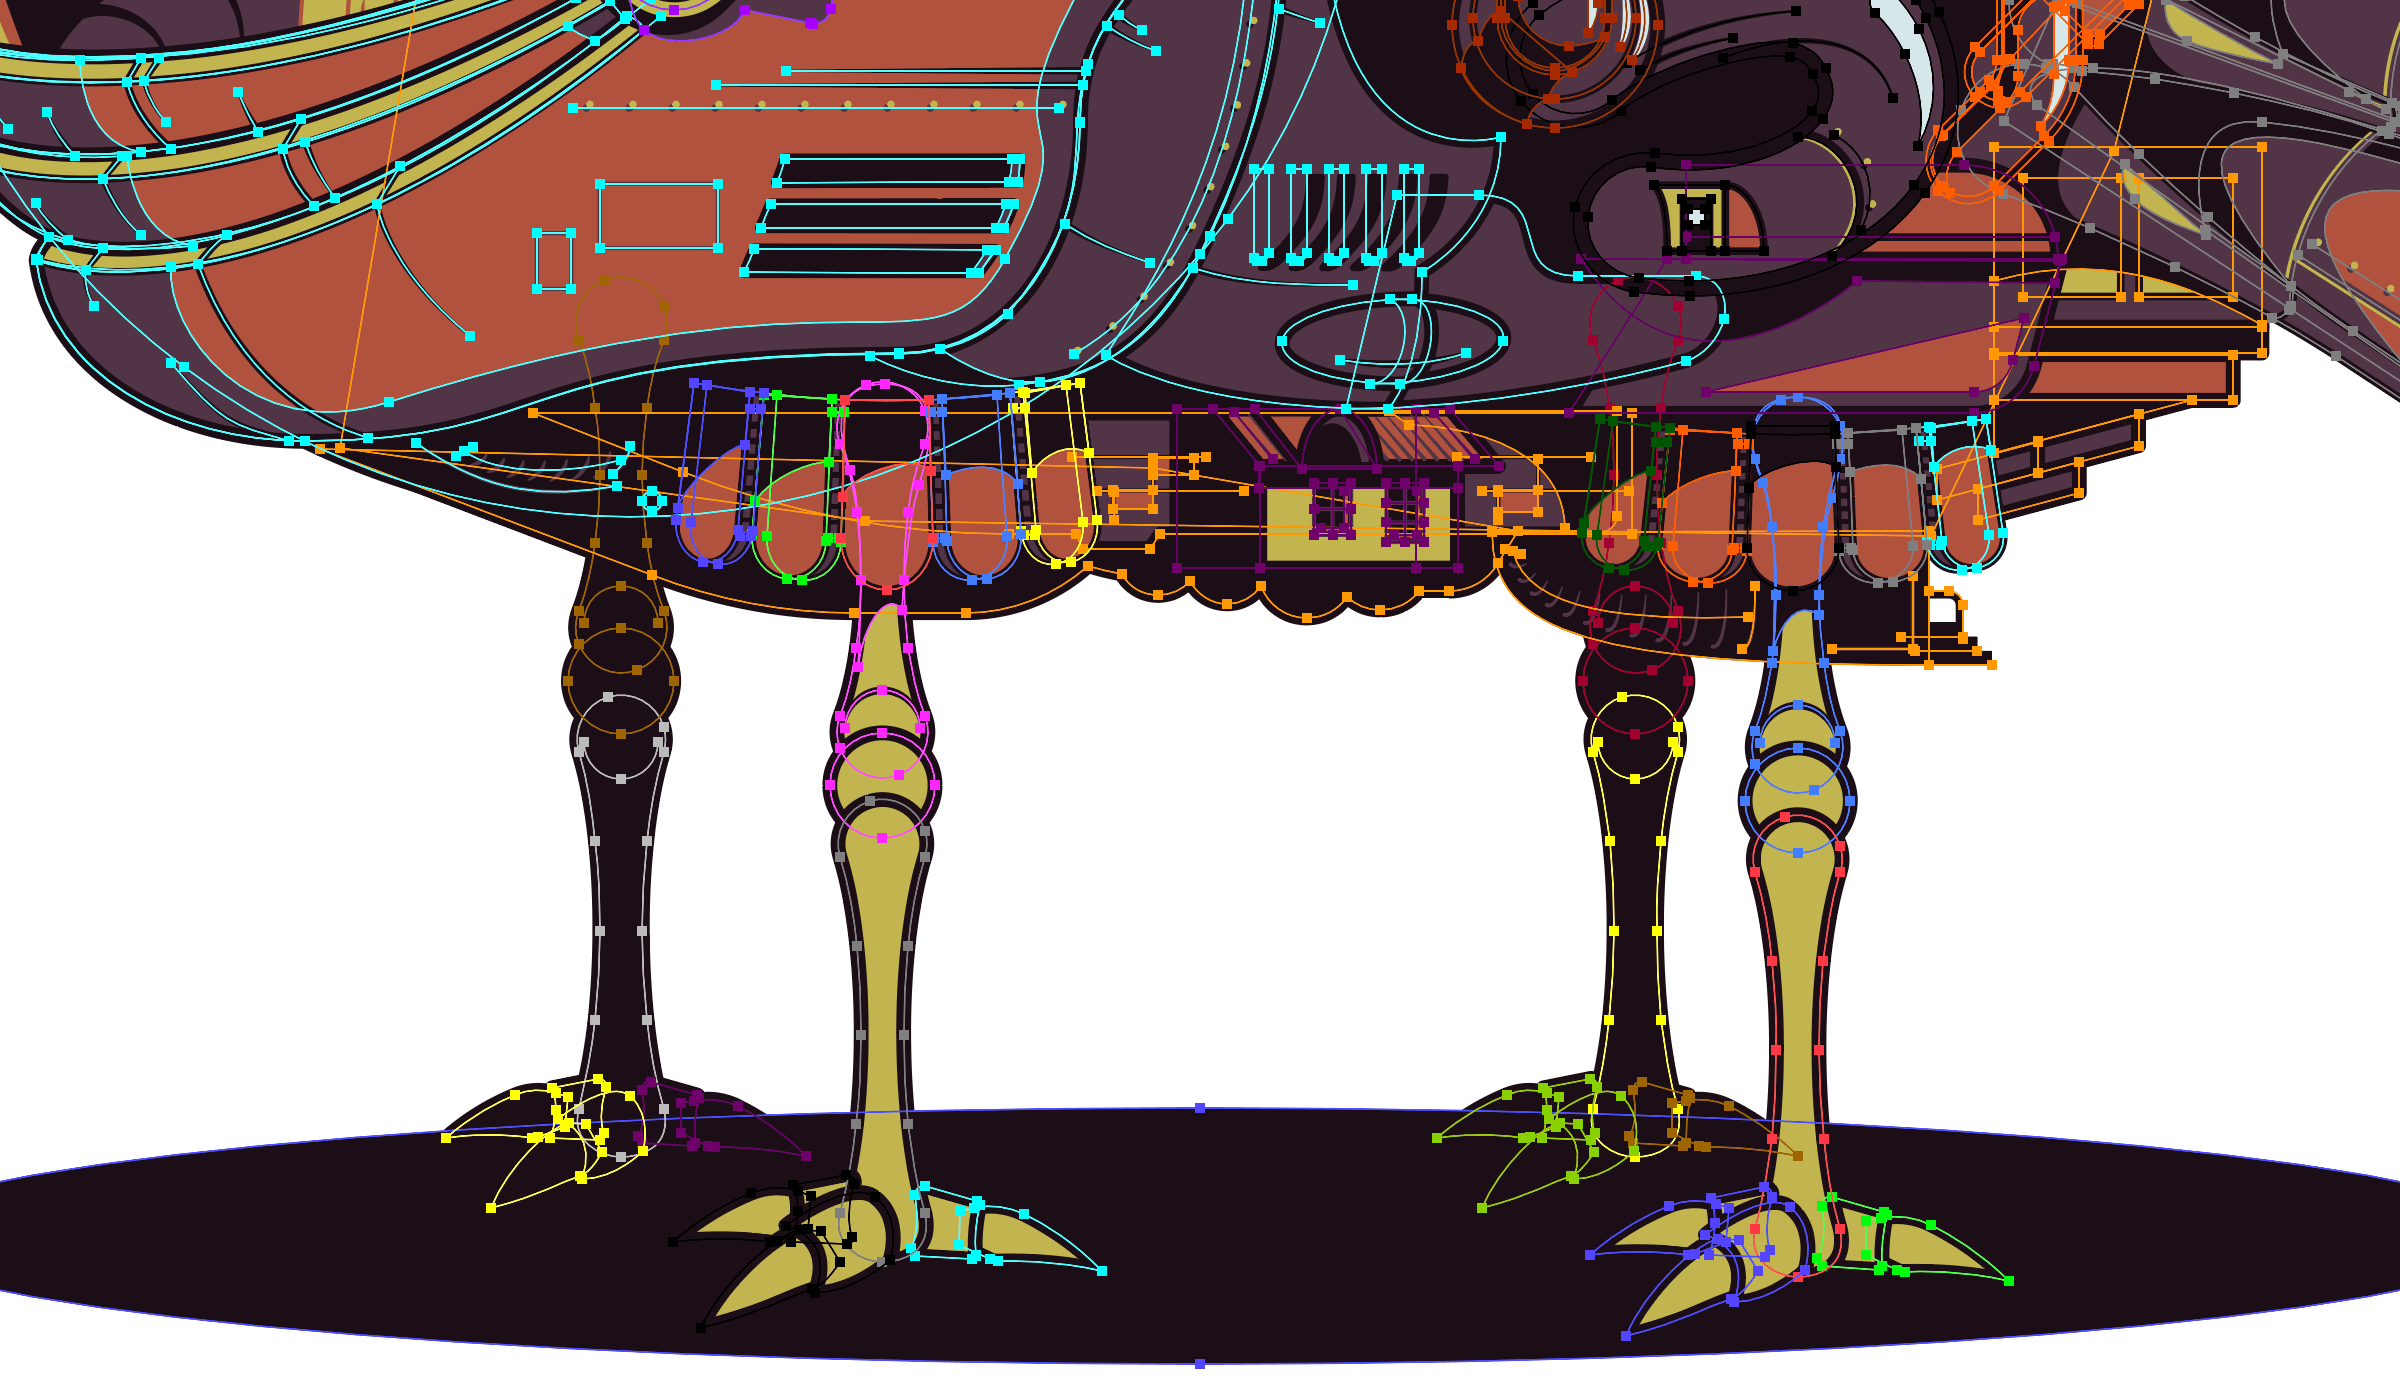
The legs are the most important element to the castle’s animation, so I started with those and worked my way up. The locomotion of the castle in the film is a weird bow-legged crab walk, but because the legs on Howl’s castle have a very bird-like appearance and positioning of joints, it seemed much more natural (and fun) to animate them with a digitigrade locomotion (Bing it 😉). With a little bit of searching, I found this classic photographic ostrich motion study from the OG master, Eadweard Muybridge.

Using the ostrich motion study as a direct reference, both the foreground and background leg were keyframed & tweened to match. Slight variations in the travel distance of the background leg were taken into account to correct for the depth/thickness of the castle. There are 4 moving parts to each leg; upper & lower sections, and front & back toes. The finished loops look like this:


The full animation loop is just shy of 3 seconds long, 2;23 to be exact (just wound up that way, not important). The first task is to duplicate the fore legs and make a hind copy. Because I’m reusing the pair, the locomotion loops needed to be offset in such a way that two feet were always in contact with the ground, and all legs moved independently, similar to a four-legged animal walking.

To achieve the desired effect of offsetting the fore and hind leg movement, some adjustments were needed to the speed and ending/loop frame of each leg.
Each leg was Time Remapped with Layer > Time > Enable Time Remapping.
A Time Remap keyframe was added to the first frame of each leg, set to 0.
A Time Remap keyframe was added to the end of the leg animation (2;23) and slid left to about the 2 second mark – this effectively shortened the animation loop to 2 seconds instead of 3. Sliding this keyframe even further left would speed up the leg, sliding it right would slow down the leg. It’s possible to get some hilarious fast chicken legs let me tell you…
An Expression was added to each Time Remap: loopOut(type = "cycle", numKeyframes = 0) This makes each leg start back at the beginning of its animation every time it reaches the end of its animation, looping indefinitely.
To refine the timing even further, the layer’s timeline can be slid to the left to change the animation period so it begins later in its loop. The Hind Front Leg timeline layer seen below has been moved left about a half second, so it’s slightly out of step.
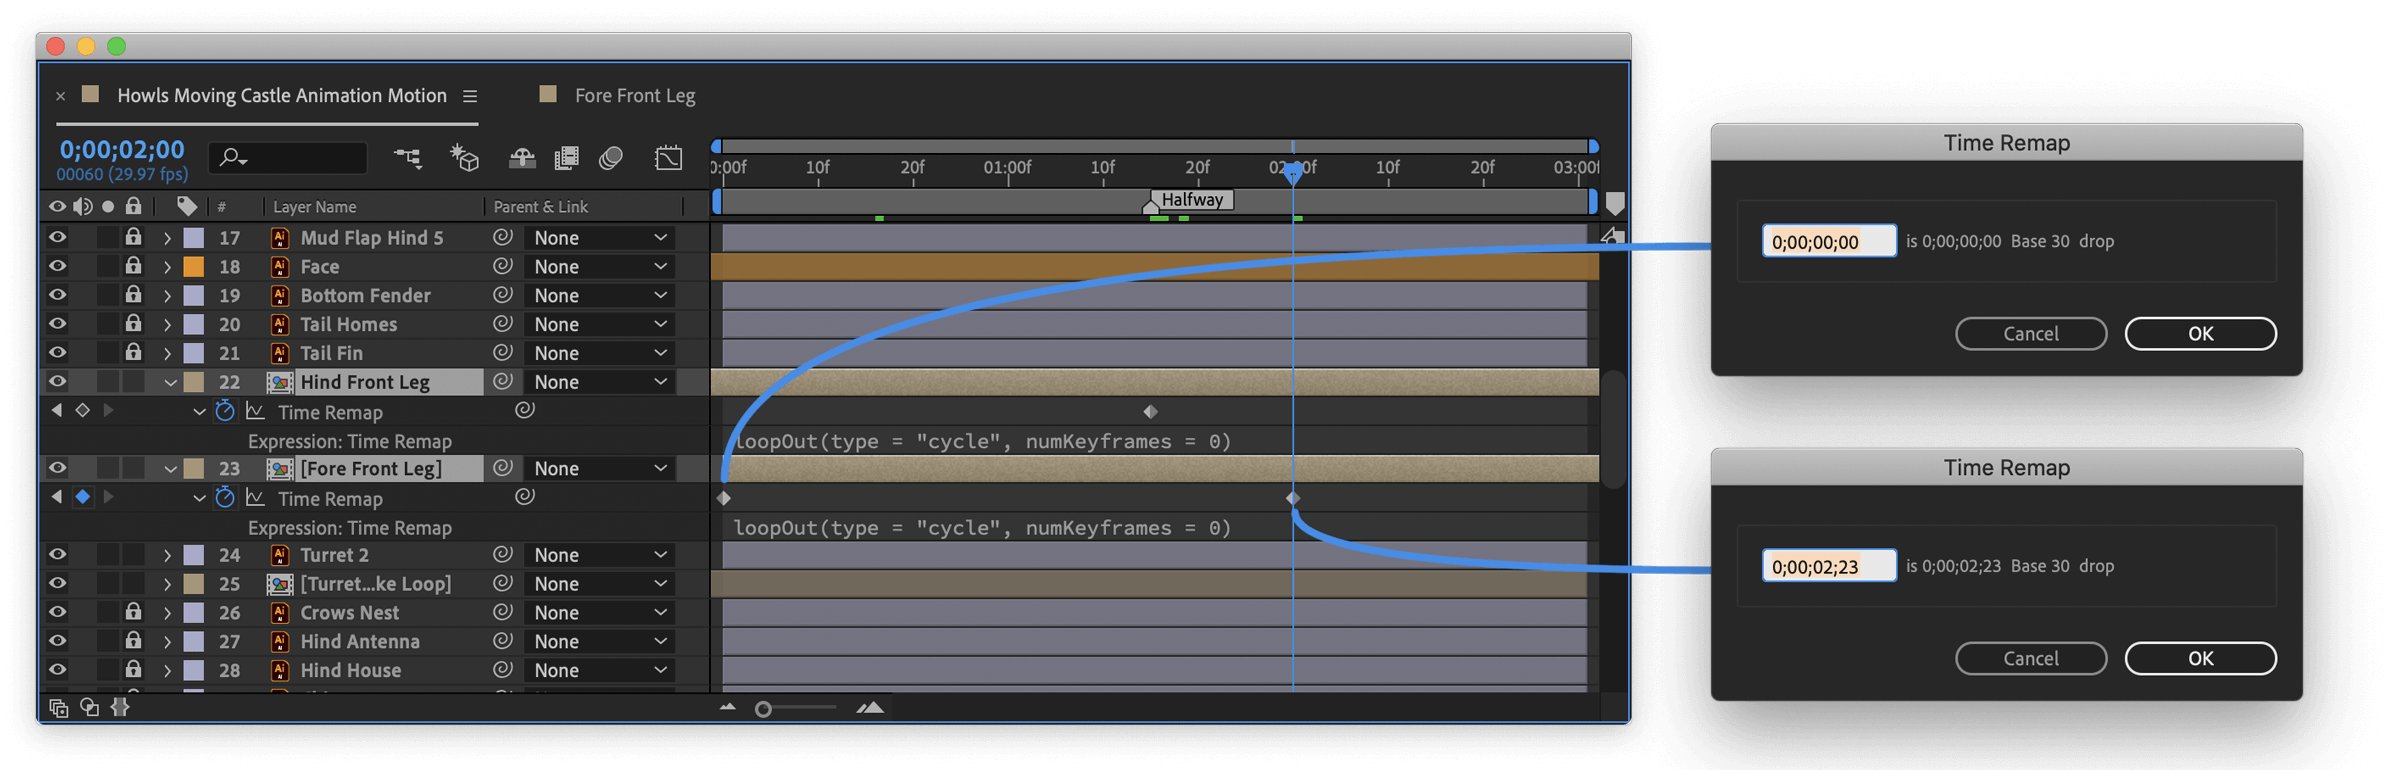
Time remap expression loopOut(type = "cycle", numKeyframes = 0) is an easy way to loop a comp indefinitely.
Here is the completed walk cycle with each leg offset into a seamless loop. Notice the legs use the same animation, only at very slightly different speeds and offsets. It took a little noodling with the animation speed and offsets to ensure the legs repeat at a suitable place once the main three second animation loop reaches the end.
Body Motion/Kinematics
Once the legs were set, the body motion was next. I didn’t bother with any kinematics, rigging, or bones because the castle is only going to be a 3 second loop, and it would be a hot mess to rig (would likely be challenging to capture the desired movements without keyframe intervention).
Starting with the face and primary turrets, everything was adjusted by hand into a bouncy bouncy assembly of interconnected pieces. Most everything is traveling up and down in a rhythmic motion, and several pieces have a slight rotation as well – notably the chimneys and tail fin. Many of the keyframes have Keyframe Assistant > Easy Ease applied for smoother motion.

There’s a lot happening here, but it’s mostly small adjustments to position and rotation.
Smoke Effects
The final portion of the animation was to add single-color smoke to the chimneys. The static castle illustration has long wispy trails of smoke which break the top of the frame. For the animated castle, I created something similar using a more natural particle simulation. The result is sticky billowy smoke, adjusted to never hit the edge of the composition.


Each smoke composition uses various values for the following effects:
Particle Playground
Position – Keyframes match the position of the particle cannon emitter with one of the chimneys.
Particles Per Second – Keyframes control the starting and stopping of the smoke.
Simple Choker
Choke Matte – By default, Particle Playground creates square particles. Choke Matter solidifies these large square particles into smooth blob shapes. The keyframes near the end increase the Choke Matte value until the particles vanish.
Fill – This ensures the color is solid yellow and has no keyframes.

The smoke compositions were then placed into the main timeline and time remapped, identical to the leg animations. And like the legs, the smoke timeline layers were adjusted to occur at various times instead of all at once. The final result is an animation with no noticeable beginning or end.
Wrapping Up
The most difficult part of this was puzzling through the leg motions to achieve a smooth loop. Applying time remap expressions and offsetting animations is a fantastic technique to continually loop animations with no noticeable beginning or end, exemplified by the legs and smoke. If you’re interested in the entire process from start to finish the video is available here.
Thanks for reading!